It’s nearing Halloween and the plants left out from the summer need to be brought in. We must repot them to prevent bugs from conquering Inside. Three bags MiracleGro like loafs of bread lean on the brick wall. The speckles on the brick wall’s grey lines reveal themselves after a couple day’s rain.
The wooden patio shares Fall’s secrets. Lowkey they would probably make great yarn colorways:
Existential Crisis Grey. Ragebait Red. Dopesy Blue. Mary Green.
Chicago’s wind brings a brisk breeze to the face. Every so slightly caressing the little hairs on your cheek. In these times a soft fuzz is just what the doctor ordered.
And let me tell you that this yarn was supposed to bring me the solace I desperately yearned on a chill’s day. Handling the yarn I was able to feel almost like a cloud between my fingers. However the integrity of the halo fuzz easily detached from the strand to the point where I rage quit after using it for about an hour.
I lost the battle but not the war.
I was determined as an artist to bring life to this yarn. It has a purpose as a product. So I elevated my thinking from utilitarian to aesthetic. How can I create something that Looked like it could only be created using that yarn?
My initial thought was creating a Halloween candy bag. It’s whimsical enough to permit a fuzzy yarn to have a place in society. The brightness of the Neon color itself brings both a focal point which can overpower or enhance. Who wouldn’t want a bright glow under blacklight candy handmade bag while walking around collecting candy?!
That’s what I thought would happen as I started to crochet with the yarn. The plan completely changed when I reached the point in the project’s circle shape where I would halt increasing the amount of stitches.
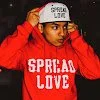
What is instead of a bag…I made a beret?!
A fashion accessory that can forgive the characteristics of the yarn I initially disliked. Now the fuzz makes sense; if you’ve ever shopped in person in Paris for a Beret then you know about the Texture of it all.
An added bonus during my process is that I did not have to frog my work AGAIN to create this new idea. I had already frogged my Work-In-Progress twice when starting and had to cut it off the first time due to yarn fibers fusing. I thought I could undo the knots but sadly I could not.
Being at the widest circumference for the candy bag I needed to make it bigger to achieve the large circle Beret shape when placed on the head. If you were to envision the size and shape of a Beret, before telling you the correct answer, do you think the Beret goes over the Forehead or over the Ears? I had not conjured up that the general Beret shape can have a few options. From short and stocky to fully round and flat. Don’t even get me started on the Men’s Beret shapes.
Now I was fully motivated and my opinion of this yarn has completely changed. So much potential can be achieved!
In the spirit of this post I encourage you to take another chance on that yarn in your stash that caused you so many turbulations in your crocheting process. It is healthy for a fiber artist to try and try again with “difficult” yarns. It triggers a kind of creative problem solving that feels amazing after gaining control over a yarn experience.
Don’t forget to tag me on social media if you create the pattern below.
Grab your favorite Weight 4 fuzzy yarn and let’s make your next favorite crochet Beret!
——————————————YARN SPOTLIGHT——————————————
KATIA YARN
GRATTE - WEIGHT 4 - 100% ACRYLLIC
Link: https://www.katia.com/EN/yarns-autumn-winter-wowgratte-1440.html
LIMON’S NOTES:
THIS YARN FEELS STABLE ENOUGH TO CROCHET WITH. ALTHOUGH PIECES OF IT PILLS AND STICKS TO THINGS AS YOU WORK WITH IT, I WILL SAY THAT IT FUSES INTO ITSELF ONCE YOU ACTUALLY CROCHET WITH IT. THE STITCHES THEMSELVES HOLDS EVERYTHIGN TOGETHER AND WILL CONTINUE TO FUSE INTO ITSELF AS YOU HANDLE AND WEAR THE GARMENT. THE YARDAGE COMES A LONG WAY, ONE SKEIN WAS ALL I NEEDED TO CREATE AN ADULT SIZED BERET.
ONE OF THE BEST HIGHLIGHTS OF THIS YARN IS THE HIGHLIGHTER COLOR OPTIONS THEMSELVES. THE PINK IS SUPER HOT PINK AND THE NEON YELLOW JUST GLOWS! HAVE FUND WITH THE OBNOXISOULY BRIGHT COLORS AND CREATE A BERET IN ALL THE COLORS!
I WOULD RECOMMEND USING A G-HOOK IF YOU HAVE CONSISTENT TENSION WHILE CROCHETING. IF YOU HAVE TIGHT TENSION THEN GO UP INTO A G+ (4.5MM HOOK). IF YOU HAVE LOOSE TENSION THEN I WOULD NOT RECOMMEND GOING SMALLER THAN A F-HOOK BECAUSE THE HOOK WOULD BE TOO SMALL TO SECURELY GRASP THE YARN AS YOU YARN-OVER.
———————————FREE PATTERN STARTS HERE———————————
MC - Magic Circle.
HDC - Half Double Crochet.
BLHDC - Back Loop Half Double Crochet.
INCREASE HDC - Insert x2 HDC in the designated stitch.
———————————
Magic Circle x10 HDC.
x2 HDC in each stitch.
x1 HDC in the first two stitches, INCREASE HDC in the third stitch. Repeat until row is complete. You’re final stitch is the starting stitch and you should have ended with an INCREASE HDC.
Continue each new row as is, including the stitches where you increase for 20 rows total (including the MC.) You will always end the row at the starting stitch with a x1 HDC.
Brim Curve: To establish a sharp curve for our circle before we start to decrease we will work backwards for one row. Once you have realigned your hook and ready to work back, we will x1 BLHDC. There are no increases in this row.
After we complete this row we will work Right Side out like we began; take note that stitches may appear diagonal so make sure you are hooking the two loops completely when completing your stitches.
We will now begin to decrease and at this point you may alter the pattern to the desired head shape. Our decreasing of stitches will create the “tension” to keep the hat on so try to avoid making the brim too tight for the wearer. For this pattern I decreased for 3 rows.
To decrease a row: x1 HDC for the first three stitches, then DISCREET DECREASE the front loop of the 4th stitch with the back loop of the 5th stitch. (I refer to this technique for my counters is “to decrease on the FOURTH.” This triggers my head count that I start the decrease of two stitches ‘on the 4th stitch.’
After you have decreased to your liking, x1 HDC into each stitch for about 7-8 rows depending on the look of the beret you are going for. Some designs cover right above the ears, and others the brim is shorter and are more higher on the head for a distinguished look. Be aware that the shorter your brim, the larger the initial circle has to be because of the natural shape of a head, it will create a head bump on the beret itself and break the design aesthetic.
***Make sure to tag me if you followed along and you can always comment with questions about the pattern.
Limon